Advanced PhotoSphere Phone App Features
This guide will go into more advanced features of the Get PhotoSphere Phone Apps.
Navigation Tip: When creating Albums or similar activities, you can go back to the previous screen by tapping the < icon in the upper-left corner.
Naming Your PhotoSphere
You can customize the name of your PhotoSphere. Many people get two PhotoSpheres so they can clear space on their phone and still have more than one copy of their files. They keep on at home and one at the office to avoid catestrophic loss.
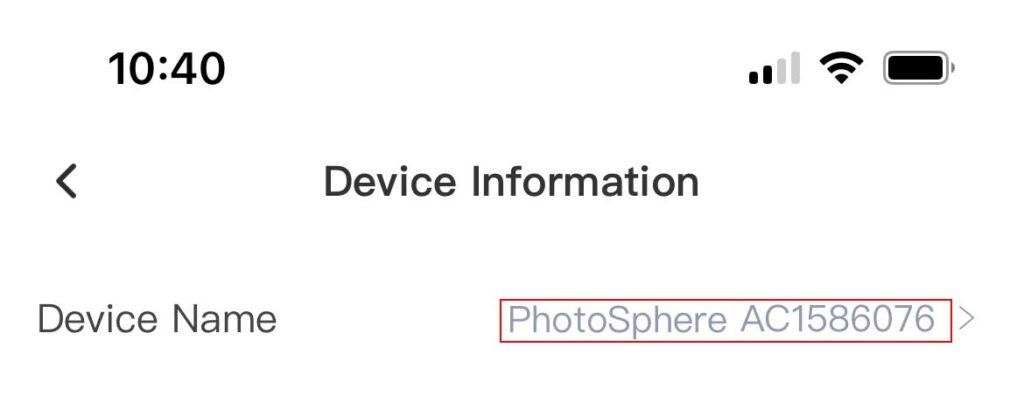
You can change the name by tapping “PhotoSphere” near the top of the app. This brings you to the Device Information page. Once on this page, tap “Device Name” to rename your PhotoSphere.
You can also access the Device Information page by tapping the “My” icon in the lower-right corner and tapping “PhotoSphere” on this page.
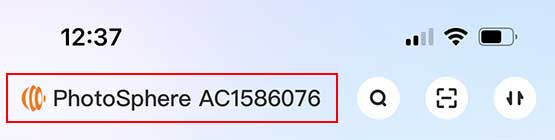
1. Tap PhotoSphere at the top of the home page.
2. Tap the current device name on the next page.
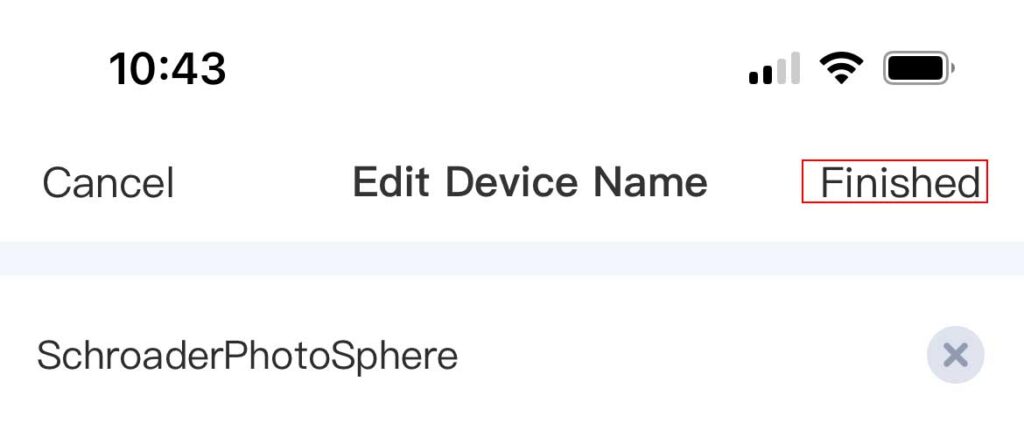
3. Enter a new device name and tap "Finished".
Search
The search bar can be accessed from the Home page by tapping the search icon. You can search by file or folder name.

Tasks
You can access the Tasks page by tapping on the up and down arrow icon in the upper-right corner of the app. Here, you will see “Transmitting” files, “Backup” records, and file “Transfer” records.

Recent Backup/Shortcut Folder/Recently Opened

On the Home page, you can choose what to display in the third section. Tap one of the tabs to change what is displayed:
Recent Backup
This displays the most recently backed up files. You can tap “Unfold” to reveal more recent backups.
Shortcut Folder
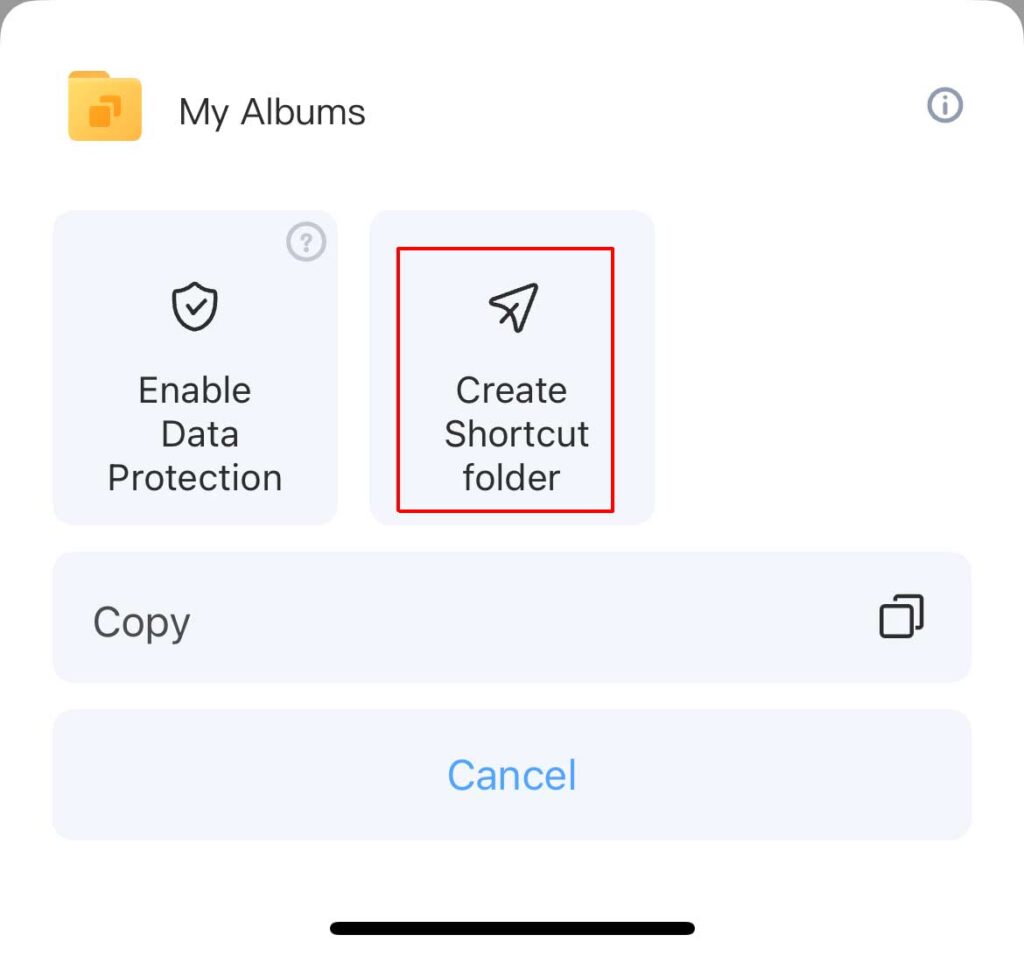
To add shortcut folders, navigate to the folder, select the folder, tap the “More” button, and tap the “Create Shortcut folder” button.
1. Navigate to the folder you want to add and select it:
2. Tap the "More" button.

3. Tap the "Create Shortcut folder" button.
Recently Opened
This displays recently opened files. You can tap “Unfold” to reveal more recently opened files.
Homepage Album
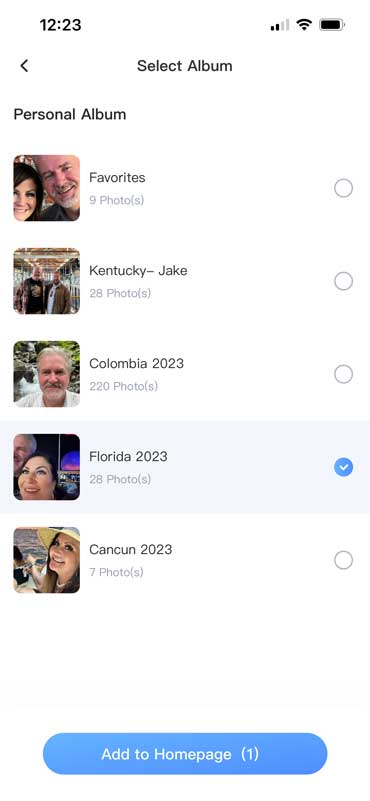
On the Homepage, you can choose what Albums you want to quickly access from the Homepage. You must have at least one Album created to add a Homepage Album.
To add an Album, do the following:
- Tap the + icon in the Homepage album section (Note: If you see a large “+” icon, this is to add photos to an existing album).

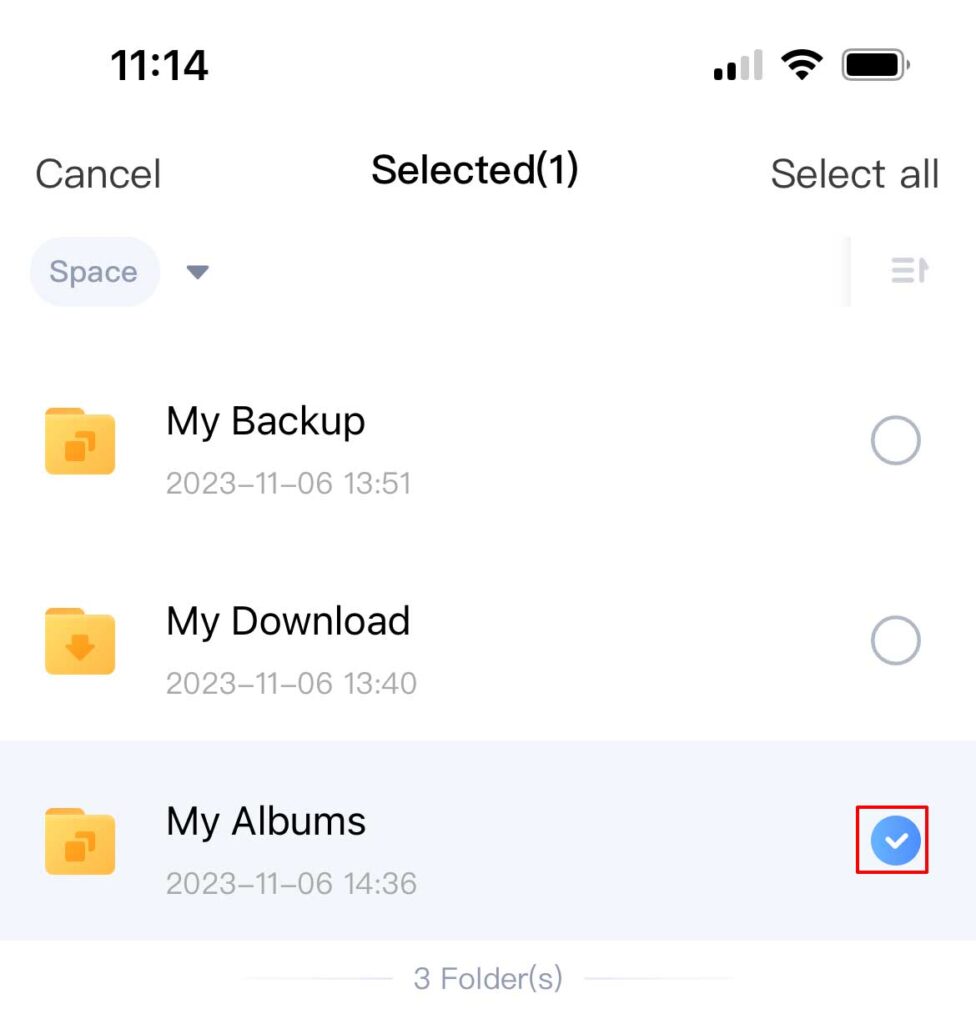
- Select one or more albums by tapping on the gray circle to the far right of the album (the circle will change to a checkmark icon).
- Tap the “Add to Homepage” button.
Creating Personal Albums
Personal albums are albums that can only be seen from devices under the primary account. Personal albums can be accessed by tapping the Albums icon at the bottom of the Home screen and then tapping the “Personal” tab.
To create a Personal Album, do the following:
- Go to the Albums page by clicking the “Albums” button at the bottom of the home page.
- From the “My Albums” tab, tap the “Create” button.

- Choose to create a New Album, Import Folder from your backups, or Import Mobile Album from your phone.
New Albums: Enter a name for the album and tap Create.
Tap the “Add” button to add photos or videos to the album (Note: You can convert this to a Shared Album by tapping the “Invite User” icon).
Add files:
The Photos and Videos tabs displays all files backed up to your PhotoSphere.
The Folder tab allows you to navigate through all your Backups to any folder.
The Phone tab allows you to select photos from your Phone.Import Folder: Navigate to the folder already backed up on your PhotoSphere.
Tap the “Create” button.
Tap the “Create” button on the next page.Import Mobile Album: Select the folder on your mobile device that you want to import as an album by tapping the circle to the far right of the album.
Tap the “Create” button.
Once an album is created, you can invite others to share the album. You can also share the album as a link without inviting people as sub-account users. This will invite them as sub-account users to your PhotoSphere. You can also tap on the main cover image to change it. You can add photos to the album at any time by tapping the “+” icon.
Creating Shared Albums
Shared Albums are albums that can be seen by anyone invited to the shared album. All persons invited to Shared Albums become sub-account users on your PhotoSphere and can add and remove photos from the album. They can also back up their own devices to your PhotoSphere.
To create a Shared Album, do the following:
- Go to the Albums page by clicking the “Albums” button at the bottom of the home page.
- From the “Shared Albums” tab, tap the “+ New Album” button.
- If you have created personal albums, they will appear on the next screen. You can tap the “shared” button under any existing album to create a shared album using that album. Or, you can tap the “Create Shared Albums” to create a new shared album. If you are using an existing album, skip to step 6.
- Enter a name for your Shared Album and tap the “Create” button.
- Tap the “1 Members” button.
- If you already have sub-account users, they will appear under “Device Member” and you can choose to share with them. If you are inviting a new person as a sub-account user, tap the “Copy Link” icon.
- Send the link in a text message, email, or other messaging app to the person you want to share with.
- The new sub-account user will need to install the GetPhotoSphere app, enter their email address when they launch the apps, and retrieve their access code from their email just like you did to create your Primary account when setting up your PhotoSphere.
Sharing Files and Folders
You can share files, folders, or albums with anyone. As mentioned in the Album Sharing section above, when you create shared albums, you are inviting the person you are sharing with to be a sub-account user on your PhotoSphere. To share files or folders without inviting the person you are sharing with as a sub-account user, follow these steps:
You can view files and folders by tapping on the “File” icon at the bottom of the home screen. For more information on how to work with files, see the section below.
To share files with anyone without inviting them as a sub-account user, select files by tapping the select icon:

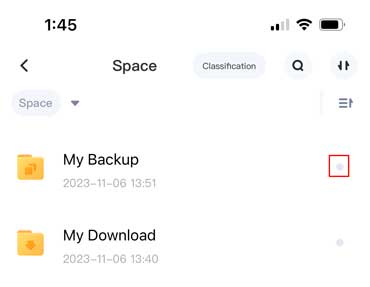
To share folders, navigate to the folder(s) you want to share by tapping the “Space” button from the File page. Tap the gray dot to the far right of the folder(s) you want to share.
Once you have select files/folders to share, tap the “Share” button that appears at the bottom of the screen:

Tap how many days you want the link to be active and then tap the “Copy Link” icon. This will copy the sharing link to your clipboard. Paste the link into an email, text message, or other messaging app and send it to the person(s) you want to share with. The link contains an access code that they are required to enter to access the files or folders you have shared.
Working with Photos, Videos, and Files
You can do a lot of things with your files once they are backed up to your PhotoSphere. To work with your files/folders, tap on the “File” button at the bottom of the home page. From here, you can view files by file type, or you can navigate through your backups by tapping the “Space” button.
Viewing Files by Category
While viewing files by category, you can tap on the select icon to select one or more files:
Viewing Files/Folders from Your Backup Space
When you tap on the “Space” button, you will see lists of files/folders. To select one or more files/folders, tap the gray circle to the far right:
Once you have select one or more files or folders from any view within the app, an options bar will appear at the bottom of the screen.

Depending on where you are selecting files/folders from, among other factors, the options may be different. Below is a list of all options you have when working with files/folders:
Share – Send a link for anyone to download the file(s)
Rename – Only available when one file is selected
Download – Downloads to the current device
Delete – Deletes them from your backup
More:
Add to Album – Add to an existing Album
Move to Encrypted Space
Copy
Navigating Backup Folders
When viewing your backup storage from the “Space” button under files, you can select folders by tapping the gray dot to the far right of the folder. After selecting one or more folders, the following options will appear:
Share – Send a link for anyone to download the file(s)
Rename – Only available when one folder is selected
Download – Downloads to the current device
Delete – Deletes them from your backup
More:
Add to Album – Add to an existing Album
Move to Encrypted Space
Copy
Encrypted Space
PhotoSphere can encrypt any document, folder, or entire device backup. To access Encrypted Space, from the home page, tap the “File” button at the bottom of the screen.
The first time you tap the Encrypted Space button from the File page, you will be asked to verify your account through an Email Verification Code. After requesting the code, check your email and enter the code. After verifying your account, you will be asked to create a 4-digit PIN. Enter your pin and verify the pin.
Now that your Encrypted Space has been activated, you can add files or folders from your device to encrypted space on the next page.
To add files or folders from existing backups, go back to the File page and navigate to files (tap on Photo, Video, Audio, or Documents) or to your folders by tapping the Space button.
Select the file(s)/folder(s) you want to add to Encrypted Space (see Files and Folders Options above to learn how to select files/folders), tap the “More” button at the bottom of the screen and select “Move to Encrypted Space”.
Message Center
The message center can be accessed by tapping on the Bell icon from the “My” screen.
The most common message will be to tell you when your hard drive hibernates. If you do not have any messages about your disk hibernating, you may be backing up your main computer hard drive. This will cause continuous backups of always changing system files causing your PhotoSphere to work overtime. This will shorten the life of your backup drive.
Settings
To access the Settings page, from the home page, tap the “My” button and then tap the Settings icon in the upper right corner.

Account Management – Allows you to add a profile picture, change your alias, change your email, or log out of your account.
Automatic Backup on Mobile – Takes you to the device backup settings page.
Allows upload and download of mobile traffic – Choose whether to transfer data over cellular data.
Auto-load Original Image under Wi-Fi – Loads the original images rather than thumbnails while on Wi-Fi.
App-Lock – Use your device’s facial recognition to unlock the app.
Message Notification Settings – Choose which notifications to receive.
Privacy Management – Manage privacy data such as the app’s access to your data and other permissions.
Manage Cache – Allows you to view and clear cache files. Warning, clearing cache files may slow down photo/video previewing.
Repair – Used for troubleshooting issues with your app.
About PhotoSphere – Information about the current version of the app.
Multiple PhotoSphere Devices
Many people choose to get more than one PhotoSphere device for redundant backups or they are invited to join other people’s PhotoSphere as a sub-account user. The app allows you to manage more than one PhotoSphere.
To manage multiple PhotoSpheres, tap on the “My” button from the home screen and then tap the “More Devices” button.
From here you, you can add a new device. It will ask you if you want to Use Directly (choose this if you are backing up different devices than your main PhotoSphere) or Existing Data Migration which will create a redundant copy of your existing PhotoSphere including backups, sub-account, configurations, etc.
Sub-Account Management
You can have multiple users on your PhotoSphere. Sub-account users are allowed to back up their own devices while maintaining privacy and to join shared albums.
To manage sub-account users and to invite new users, do the following:
- Tap on the “My” button from the Home page.
- Tap the “Guest Accounts” button.
- To invite new sub-account users, tap the “Invite Guests” button and enter their email address. They will receive an invitation via email to join your PhotoSphere.
- To manage existing guests, tap on their email address:
- View their Alias
- Edit their Alias by tapping on “Alias”, making your edits, and tapping “Finished”
- View how much space they are using.
- View the date they joined.
- Turn On/Off access to the external drive. When turned off, this prevents the user from accessing any external USB storage attached to the PhotoSphere.
- Delete user.