Get PhotoSphere App for Windows and Mac Computers

After Your Initial Setup, Learn the Basics of the Get PhotoSphere Apps for Computers
The app for Windows computers is almost identical as the app for Mac computers. This tutorial will show screenshots from the Windows app but should be almost exactly the same for Apple computers.
A note about your PhotoSphere: We designed PhotoSphere to last. This means that by default, the hard drive shuts down when not in use. So, it is only active when you are backing up photos, viewing photos, or someone you are sharing with is accessing shared files. This means that when you take a photo with your phone, it won’t be backed up until you “activate” your PhotoSphere by opening the Get PhotoSphere app.
Logging In
When you initially set up your PhotoSphere, you should have logged into your PhotoSphere by using the QR scanner on the phone app. By default, the PhotoSphere computer app is set to auto-lock when your computer is idle for 5 minutes. To unlock your PhotoSphere app on your computer, scan the QR code on your computer screen using the phone app:

Open the app on your phone and tap the QR code icon in the upper-right corner.
Scan the QR code displayed on your computer screen and your app will unlock.
To disable auto-lock:
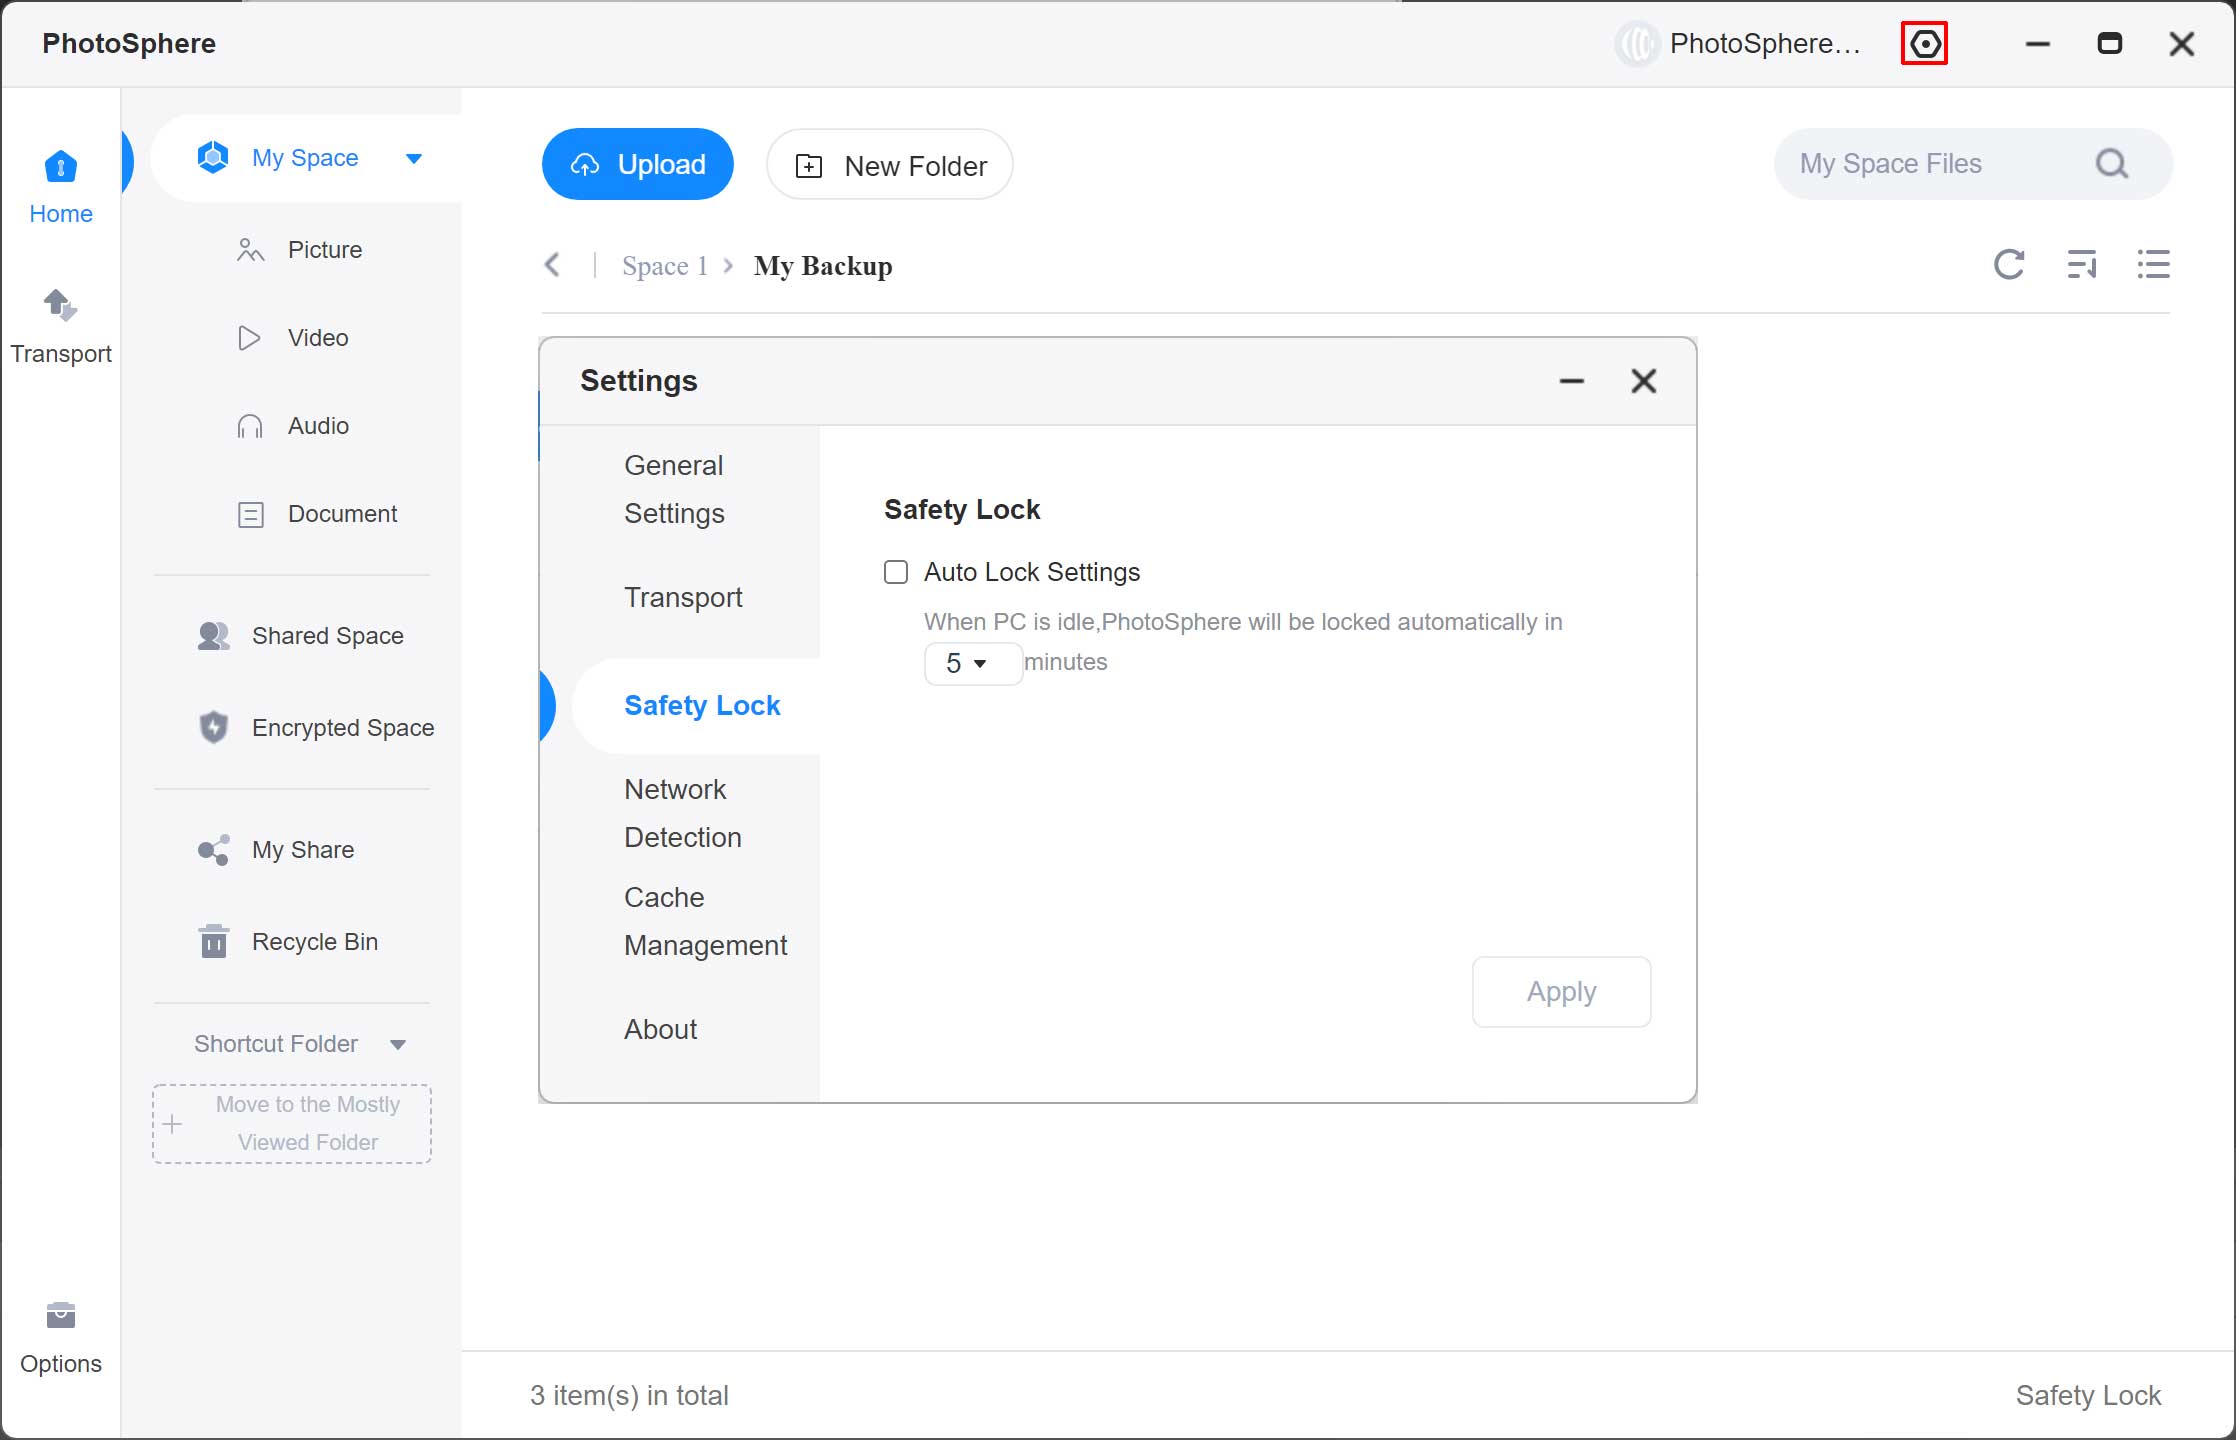
- Go to the settings icon in the upper-right corner and click on “Settings”.
- Click on the “Safety Lock” tab, uncheck “Auto Lock Settings”, and click “Apply”.
Home Screen
The PhotoSphere app for computers is easy to use. It has fewer options than the phone apps but you can access all your files from all your devices, view files, and share them with others.
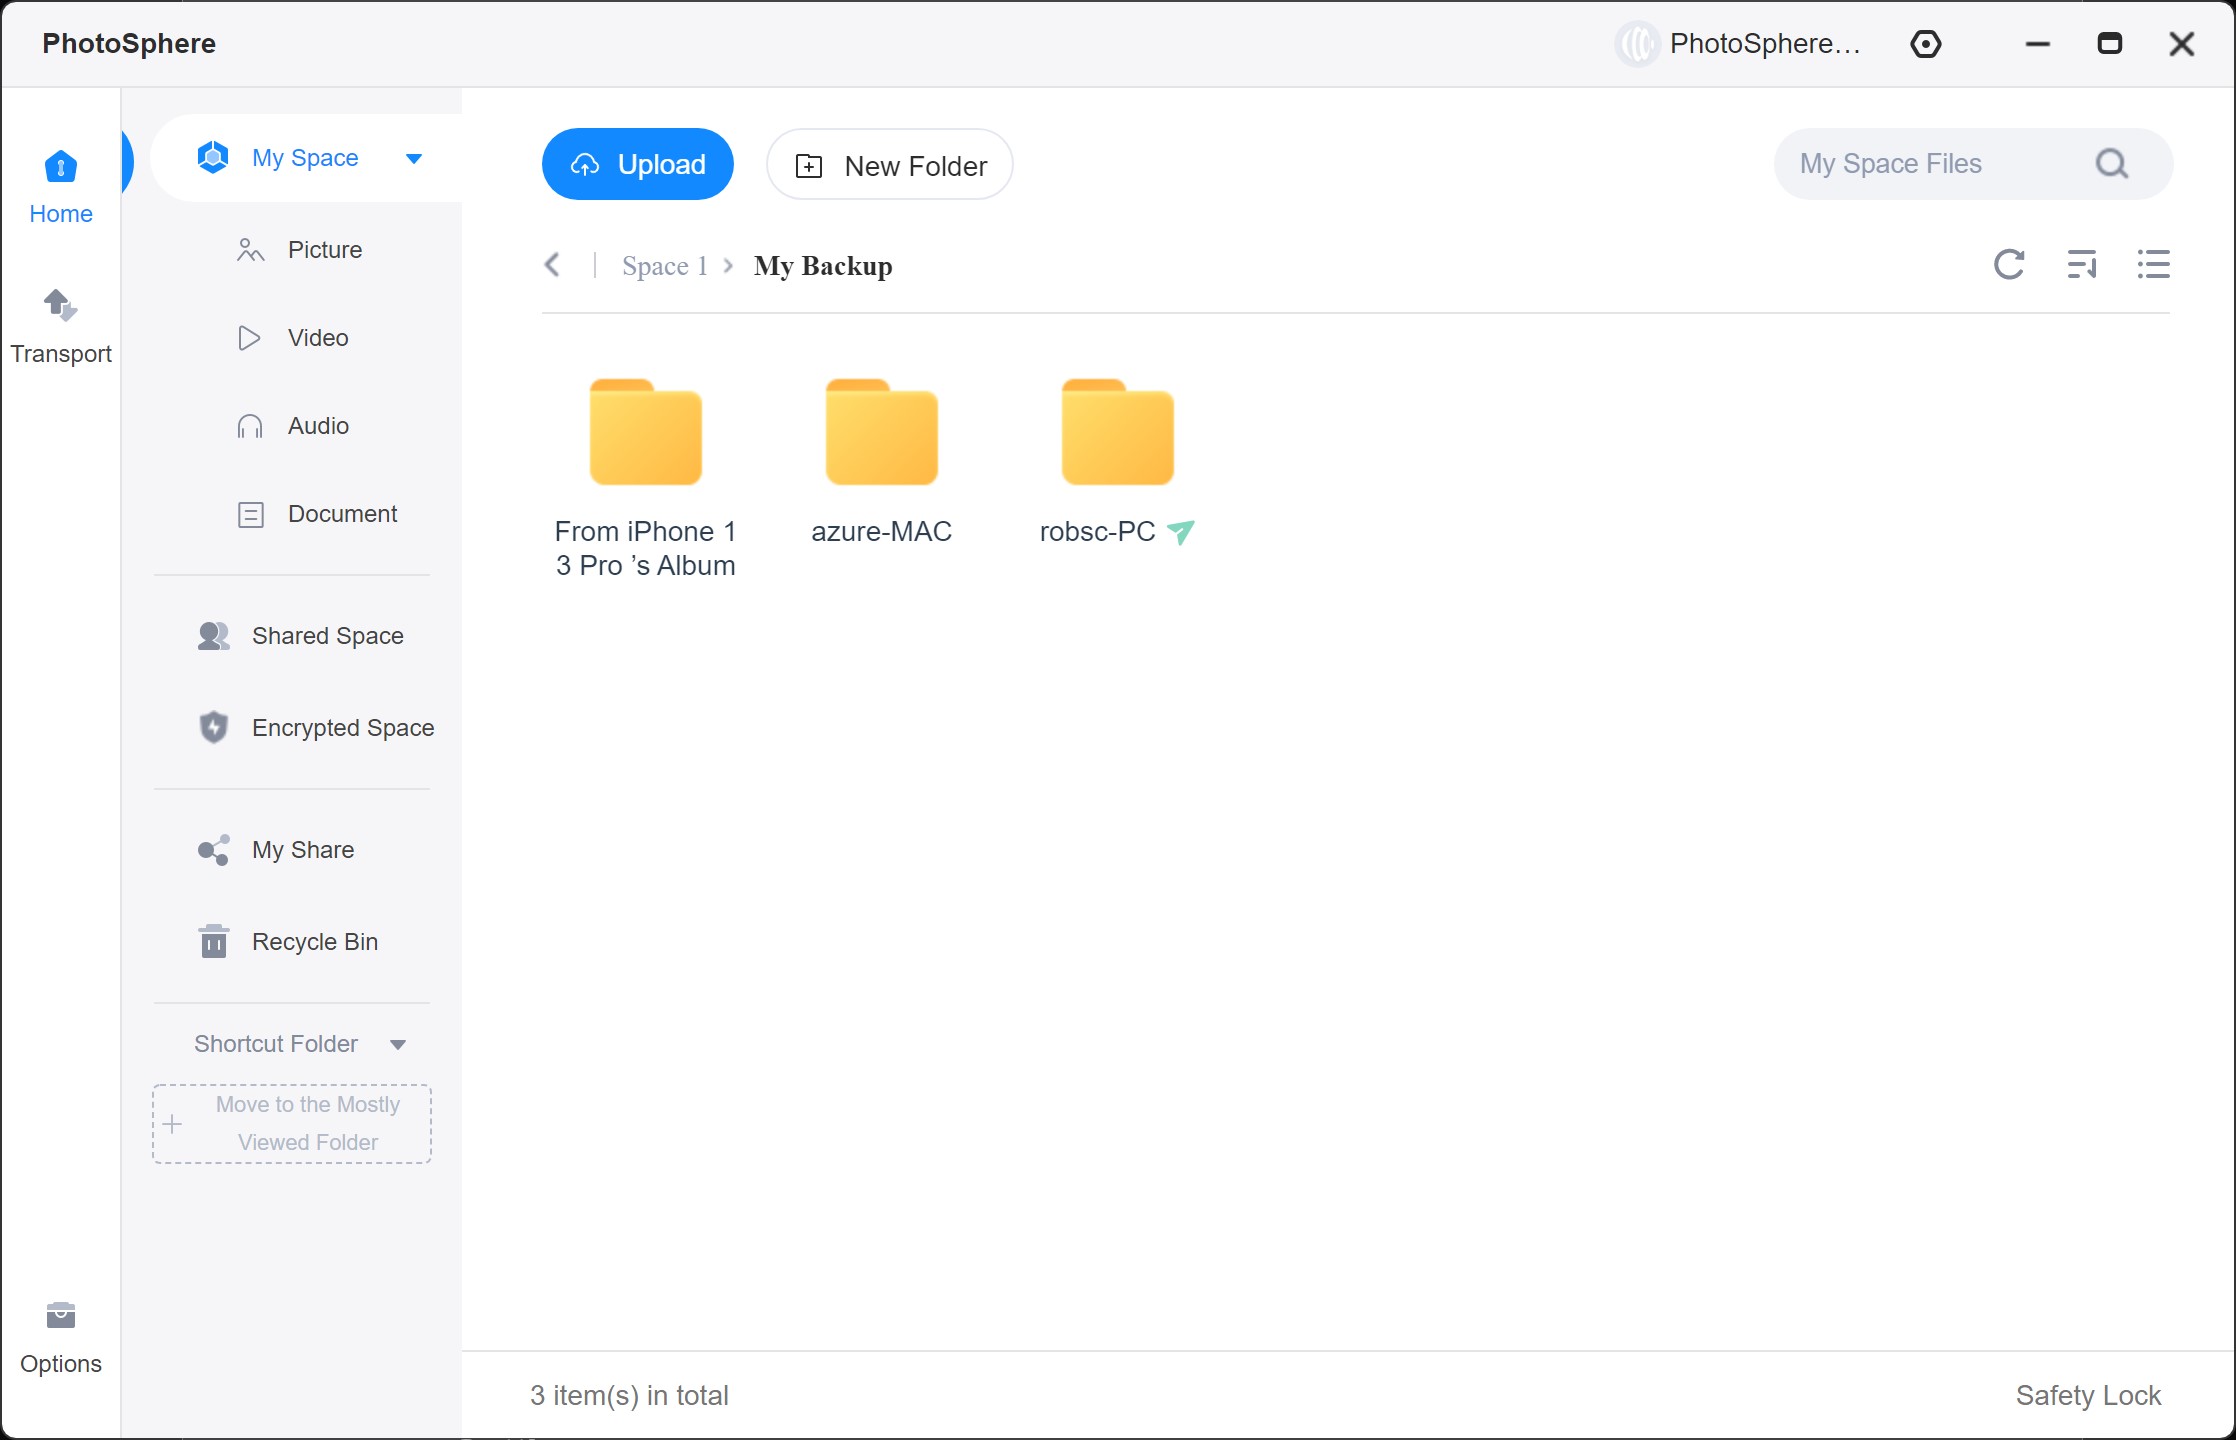
My Space
From the “My Space” tab, you can navigate to all your backups. Files are organized as they are on the original devices. You can sort them by file name, date, or size. You can also change the view from a grid to a list. The refresh button will update the files to show newly backed up files from all your devices.
Picture, Video, Audio, & Document View
Click on any of these categories to view backed up files. This view consolidates all files from all devices. You can sort them by the name, date, or size. For full photo management, see the help section about Tonfotos, the photo management software included with your PhotoSphere.
Shared Space
Unlike shared Albums on the phone apps, the Shared Space on the computer app allows you to create shares for any type of file or folder. For more details, see the section below on creating shares.
Encrypted Space
Access encrypted files, folders or backups by entering your passcode. Once in encrypted space, you can view encrypted data or upload new encrypted files, folders, or backups. To add existing backup files, see the section below on encrypting data.
My Share
My share shows current and past shared files. Remember, shared files are different than shared Albums. Shared files are links sent to people you wish to share with while shared Albums require sharing with sub-account users.
Recycle Bin
Just like with computers, the Recycle Bin holds onto deleted files until you empty it to clear up space on your PhotoSphere drive.
Shortcut Folders
When you set up shortcut folders on your phone app, they will appear on the computer app for easy navigation to your favorite folders.
Options
One of the first actions you will want to take after logging into the PhotoSphere computer app for the first time is to set up the folders on your computer that you want backed up. This is done in the Options page.

- Click on the “Back up PC Files” button.
- A window will open. Click on the “Add Backup Folder” button.
- Navigate to the folder or drive you want to be backed up to your PhotoSphere and click “Select Folder”.
You can also remove backup locations by clicking on the “X” or view contents by clicking on the folder icon.
It isn’t recommended to back up your entire main hard drive. Computer operating system files are constantly changing. This would cause your PhotoSphere to have constant traffic, slowing down your backups and access. It will also keep your PhotoSphere drive active continuously, reducing its life. We recommend backing up “Documents” folders, or other folders where your store you files.
Duplicate files
You can also remove duplicate files to clear space on your PhotoSphere and to organize your files better.
- Click on the “Duplicate Files” button.
- Choose to scan specific folders or to scan all folders which will scan all backups from all devices.
Note: PhotoSphere detects exact duplicates using has values or file fingerprints. Similar copies of files that are not exact duplicates cannot be detected. If photos have been filtered, resized, or altered in any way, they are not exact duplicates. Similarly, if documents have been edited and saved to a different location, they are not exact duplicates. However, if a document is copied to a different location without being edited, it can be detected as an exact duplicate.
Settings
To change settings, click on the settings icon in the upper-right corner.
General Settings
The general settings allow you to control things such as launching the app at startup (recommended), auto-updates, and more.
Transport
This allows you to throttle the number of simultaneous tasks for uploading and downloading. It also allows you to change the default path for downloading files.
Safety Lock
Turns on or off the auto-lock feature.
Network Detection
Scans your network for connection issues to troubleshoot connection issues.
Cache Management
Allows you to clear cache files. Cache files speed up viewing images.
Shared Space
You can share files or folders with anyone. Sharing is done through links that you send to people. Please note that this is different than inviting someone as a user to your PhotoSphere which can only be done through the phone apps.
Sharing Existing Files or Folders
To share any file or folder on your PhotoSphere, follow these instructions:
- From the Home page, click “My Space” and navigate to the file/folder you wish to share.
- To share single files or folders, right-click over the file/folder and click “Share”. Select how long the link will be active and click “Create Link”.
- To share multiple files/folders, select multiple files/folders by clicking the box that appears in the upper right-corner when you hover. Once selected, right-click and click “Share”. Select how long the link will be active and click “Create Link”.
- The link is automatically copied to your clipboard. Paste the link with access code into an email or message and send to the recipient(s).
Creating a Shared Folder
Creating a shared folder allows you to create a shared space that sub-account users can access. When you create a shared folder, it is blank or sub-account users that are invited to the shared space can upload files.
To create a Shared Space, do the following:
- Click on Shared Space from the left side navigation.
- Click the “Create a Share” button, select “Create a Share”, and then click “Space 1”.
- Next, select existing sub-account users to share with or click “Copy Share Link Invitation”. You can send the link to anyone via email or message and they will be invited to join your PhotoSphere as a sub-account user and join your shared folder.
- Click the “Add” button to upload files to the share.
- You can manage users of the share by clicking the “Manage” link. Here you can add new members, remove members, or change their editing permissions.
Note: Files shared by right-clicking over files/folders will not appear as shares under Shared Space.
Encrypted Space
The Encrypted Space page allows you to access data encrypted by the phone apps or upload new data to encrypted space.
To add files/folders to encrypted space from the My Space or category view, right-click over the file/folder and select “Move to Encrypted Space”. This sill remove it from the current location and move it to Encrypted Space.
To access Encrypted Space, enter your pin and click the “Enter Encrypted Space” button.
To upload new files to be store in encrypted space, click the Upload button. Select File or Folder, navigate to the data to upload, and click open.
To create new folders, click the “New Folder’ button and name the folder. Once created, double-click to open the folder where you can upload files/folders.
Right-Click Menu
When viewing files/folders from My Space or file categories, you can right-click over files/folders and a context menu will appear:

Download
Downloads the selected file/folder to your computer.
Share
Allows you to create a share link to send to others.
Move to
Allows you to move locations.
Copy to
Allows you to copy to other locations.
Move to Encrypted Space
Encrypts the data and moves it to Encrypted Space.
Rename
Allows you to rename the file/folder
Details
Displays file details such as name, size, and modification date.
Open the File Location
Opens the file location on your PhotoSphere.
Delete
Deletes the file/folder.